Tamil Downloads
Thursday, November 18, 2010
Wednesday, November 17, 2010
Get Smart with Smart Objects
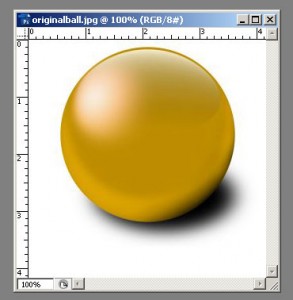
Photoshop has been moving towards letting users do everything non-destructively. The biggest advantage digital artists have over artists that use other mediums is the ability to go back and fix things with out having to start over. Smart Objects is the latest tool in our powerful arsenal that allows us to do a whole lot very quickly without any fear of doing any irreversible damage. As all other tutorials on this site, we’ll go ahead and learn about Smart Objects by jumping right into Photoshop to explore this topic.
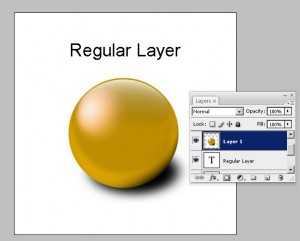
Next, I opened a new blank image by going to File > New. Next, using the move tool, I clicked on the originalball.jpg layer and dragged it into the new image. This created the following:
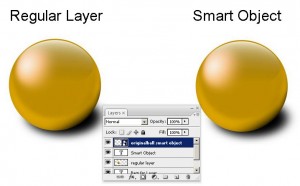
After increasing the canvas size a bit, I added a Smart Object next to the regular layer. To do so, go to File > Place and choose the originalball.jpg image. This created the following:
They look identical at the moment. I can see the layers palette. The icon for the Smart Oject is different than a regular layer.
Next, let’s try resizing both the regular layer and Smart Object multiple times. Transform both objects to half their size, then resize both of them to three times their size, then resize them back to their original size. Now if we inspect the edges of the regular layer and the smart object, this is what we find:
You can clearly see, that the Smart Object edges are just as good as the original while the regular layer has degraded and blurred after just a few transformations. This is because a smart object resamples the original image during each transformation while a regular layer only transforms the current state of the layer and causes degradation.
You can also add multiple copies of a Smart Object on to the canvas by right clicking on a Smart Object Layer in the layers palette and then clicking on “Duplicate Layer”. Next if you double click on one of the copied Smart Object Layers in the layers palette, it will open that layer in a new window and give you the following warning:
Click on “OK” and the original image will open up in a new window. Edit that image and then click on File > Save. Next, return to your image with the smart object, and your change will be reflected in all the instances of the Smart Object. This is useful for example when you may be editing buttons for a navigation menu.
You can also convert any existing layer into a Smart Object by right clicking on the Layer in the Layers palette and clicking on “Convert to Smart Object”. The layer can then be used as a Smart Object.
Also, you can not use the paint brush directly on a Smart Object. You must either rasterize it or double click on Smart Object Layer in the Layers palette in order to directly edit it.
Smart Objects have further features as well and I’ll cover them in my next post about Smart Objects. I hope you found this introduction to Smart Objects helpful. Leave a comment if you wish!
Smart Objects are Links
Those who have some experience with creating web pages will be familiar with the <img>/image tag. When one wants to add an image into a website, they will use the <img> tag and link to an image. Then they are free to change certain image properties such as the size or borders using CSS. They are also able to create multiple images by adding multiple <img> tags on to a web page. This creates multiple instances of the same image on to one web page. If someone edits the actual image file that is being linked to using the <img> tag, then that edit will be reflected on all the instances of that one file.Next, I opened a new blank image by going to File > New. Next, using the move tool, I clicked on the originalball.jpg layer and dragged it into the new image. This created the following:
After increasing the canvas size a bit, I added a Smart Object next to the regular layer. To do so, go to File > Place and choose the originalball.jpg image. This created the following:
They look identical at the moment. I can see the layers palette. The icon for the Smart Oject is different than a regular layer.
Next, let’s try resizing both the regular layer and Smart Object multiple times. Transform both objects to half their size, then resize both of them to three times their size, then resize them back to their original size. Now if we inspect the edges of the regular layer and the smart object, this is what we find:
You can clearly see, that the Smart Object edges are just as good as the original while the regular layer has degraded and blurred after just a few transformations. This is because a smart object resamples
 the original image during each transformation while a regular layer only transforms the current state of the layer and causes degradation.
You can also add multiple copies of a Smart Object on to the canvas by right clicking on a Smart Object Layer in the layers palette and then clicking on “Duplicate Layer”. Next if you double click on one of the copied Smart Object Layers in the layers palette, it will open that layer in a new window and give you the following warning:
Click on “OK” and the original image will open up in a new window. Edit that image and then click on File > Save. Next, return to your image with the smart object, and your change will be reflected in all the instances of the Smart Object. This is useful for example when you may be editing buttons for a navigation menu.
You can also convert any existing layer into a Smart Object by right clicking on the Layer in the Layers palette and clicking on “Convert to Smart Object”. The layer can then be used as a Smart Object.
Also, you can not use the paint brush directly on a Smart Object. You must either rasterize it or double click on Smart Object Layer in the Layers palette in order to directly edit it.
Smart Objects have further features as well and I’ll cover them in my next post about Smart Objects. I hope you found this introduction to Smart Objects helpful. Leave a comment if you wish!
Subscribe to:
Posts (Atom)


